Git
What is Git?
The modern de facto standard in version control is Git. Version control software allows you to manage and track changes to files over time in a project. It is especially beneficial for keeping track of source code as it is being developed and debugged. You may not use it in all of your classes but it is extremely helpful to use for many reasons:
If you properly version your software, it is much easier to undo mistakes. For example, reverting to an earlier version of the code before you implemented a feature that introduced a bug, or restoring the files you just accidentally deleted. You can also view differences between different versions of the code, so if you do introduce a bug, you can more easily identify what change caused it.
It makes it simple to transfer your code to your instructor. If you need feedback during office hours, instructors can simply pull up the most recent version of your code from your project repository. Similarly, when it is due, your professor or TA can just grade the latest version of your code.
Version control is great and important technology to be familiar with. You will almost certainly use it later in the major and in your career. Why not get a head start?
In the Computer Science department, we use git for version control.
This page will introduce you to the basic functionality of git.
One-Time Git Setup
One time only, before you use git the first time, you need to tell it
a little bit about yourself and your account. This configures git to
know you are part of the department’s GitLab. Run the following commands
in your terminal, supplying your full name and email address:
git config --global user.name "${your name}"

git config --global user.email ${username}@wwu.edu
Manage GitLab Projects Using SSH
If you will recall from previous pages, SSH allows you to remotely connect
to another machine using your account on that computer (if you have not
gotten there, please read the SSH Guide). In this case,
git uses the SSH connection to interact with your remote repository.
As noted in the SSH page, you should never give out your private key
to anybody. That is yours and yours alone. You will, however, need to
give GitLab (accessible on the department’s CS GitLab Page) Your public SSH key.
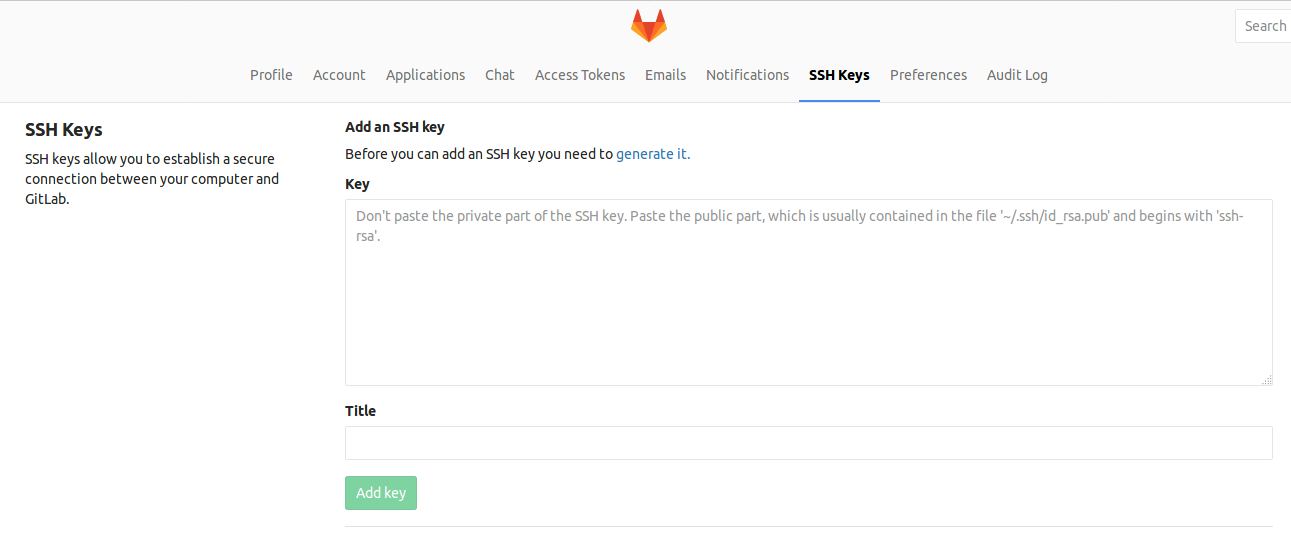
You can add your public key in your
user settings on GitLab by accessing the SSH Keys tab on your profile
and copy the public portion of your key into the text box.
After creating and adding your public key to GitLab add an entry to your ~/.ssh/config file that provides the name of your private key. For example, if your private key is named gitlab_ed25519_key your entry would look like:
Host gitlab.cs.wwu.edu
  PreferredAuthentications publickey
  IdentityFile ~/.ssh/gitlab_ed25519_key
After this you can clone your project/repo using the instructions Git Repository Setup
Using Git
Git Terminology
The setup you will most likely encounter throughout the major will include three main components:
the main or remote repository - The online primary copy of your code repository. If you use
gitproperly, it will contain a record of all versions of your code as you develop it. This is the location instructors go to find your current code during office hours and for grading.the local working copy - The current version of files you are editing stored on a local machine. This can be put anywhere you like, for example,
~/schoolWorkingCopy/. As the name suggests, the local working copy is where you will develop your project.the local repository - Contains a record of all current and previous versions of your code as you develop it, but it is stored locally to compare itself against the remote repository. This is stored in the .git hidden subdirectory of your working copy. If you use
gitproperly, this version will stay in sync with your remote repository. Do not directly edit any files in your local repository! That isgit’s job, using the following commands will update this repository using the changes in your local repo.
Repo Setup
The easiest way to create and start working on a project repo is to create a New Project on GitLab and then “clone” it onto your machine. To do this, find the new project button on the home page of GitLab, give your project a name, and click “Create Project”


After you first create a repository you will need to choose a local
location to clone your working copy. Let’s assume you choose
~/schoolWorkingCopy. To clone your repository, use the git clone <url> <local location> command:
git clone ${ssh url} ~/schoolWorkingCopy
Where ${ssh url} is found here:

Note: If you click the drop down location just to the left of the repository url, you will notice you have an option between SSH and HTTPS. While HTTPS can be easier to configure for a beginner, as a student in this department you will need to familiarize yourself with the capabilities and the added security of SSH. If you are curious about other options of interacting with your repository, feel free to read documentation provided by GitLab and GitHub on their respective websites.
Individual Work Flow
Now that you have set up your local repository, you are ready to work on
developing your code. There is a basic flow of work when using git in
your local working repository (~/studentWorkingCopy in our case).
If you use multiple computers to work on a project, you will want to make sure that your local and remote repositories are synced up before you start working. The command you will need is
git pull --all.-
As you add, delete, or change files in your program, you will have to
addthese changes to keep track of them in your repository:-
git statuswill tell you which files you have changed. -
git addwill stage any new file or changed files to be committed to your local repository (.git directory).
-
Repeat step 2 until you get to a good stopping point to commit your changes.
-
When you are ready, you will need to finalize your staged changes to the repository with
git commit:-
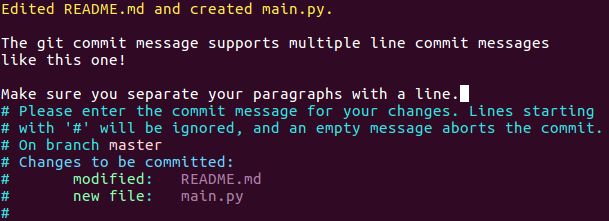
Using
git commitby itself without the-mwill open a text editor in your terminal, Vim by default (See this section if you are unfamiliar with terminal text editors). If you save and exit the editor with no uncommented text, it will abort the commit. Side note: you can specify your default text editor by using the command
git config --global core.editor "$EDITOR"-
Using
git commitwith the-mflag, you can specify a short commit message quickly.
-
-
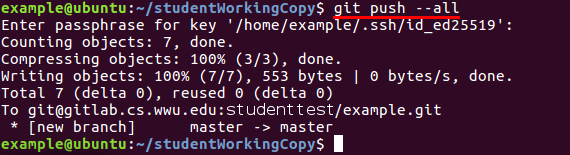
The last step is to push your commit(s) to your remote repository with
git push. This will update your remote repo to the current version of your project. Repeat steps 2 through 5 as necessary!


Conventions on Commit
The use of commit messages are to summarize recent changes you have made
and relay that back to your remote repository. It all depends on how you
use git. For personal usage, you can do anything. If you are with a
team, its good to talk about conventions so everyone knows the work flow
everyone would like to see. You can use the -m flag you to fit what
you did in one quick line. In some cases, you will want to use the command
git commit to explain what is getting you changed with some context and
reasoning.
Here is an article that will give you perspective on the power of commit
Group Work and Version Control
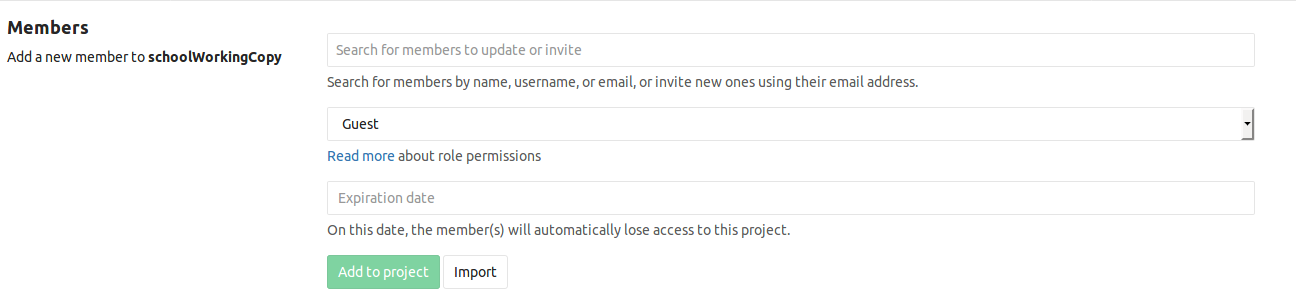
You may have heard that you can use version control to work on group projects. If you simply have a group project in a class, it is easiest to have one person create a repository and have the rest of the team added as developers on the project. You will find under settings for projects you create the members section and you can decide what roles should be given to each new member there. Feel free to look up the documentation by GitLab for the different roles in a project in order to assign as you see fit. Generally, you will be looking to add people as developers at most. Below is what the website will look like when you get there.
Another form of group work through version control you may encounter in
the department is forking. This is generally done when you come across a
project that you have not worked directly on but would like to make an
addition to. Instructors may choose to create a project where they ask
you to fork from their own repository and grade work submitted to your
own copy of the main repository they create. The process of forking is
really powerful and probably the one that gets confused over the most.
Let’s go through the process beginning to end of a team on GitLab called
groupteamthing creating a repository for a project and user
billieSmith coming across something they want to change.
billieSmithforks the main repository fromgroupteamthing.billieSmithclones their forked repository to their working machine. This happens on the GitLab website and the fork button is found underneath the name of the project you want to change.
-
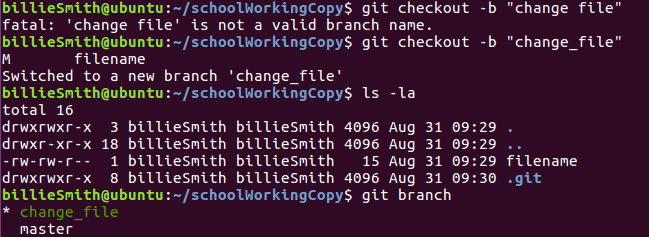
billieSmithcreates a branch on their machine. The command to do this isgit checkout -b ${name of branch}. The purpose of this is to specify exactly what from another project you want to change and so the name should reflect that. It is invalid to include spaces in your branch names.-
By the command
git branch,billieSmithcan see all the branches at their disposal.
-
When you create a new branch you automatically get switched onto that branch. Now,
billieSmithis on the new branch so they can work on their change. This step follows a lot of the individual steps as mentioned in the section above.-
To let
groupteamthingknow that someone fixed something on their project,billieSmithneeds to commit their work and push to their remote repository.-
These two commands are the same as you do for your individual work.
-
-
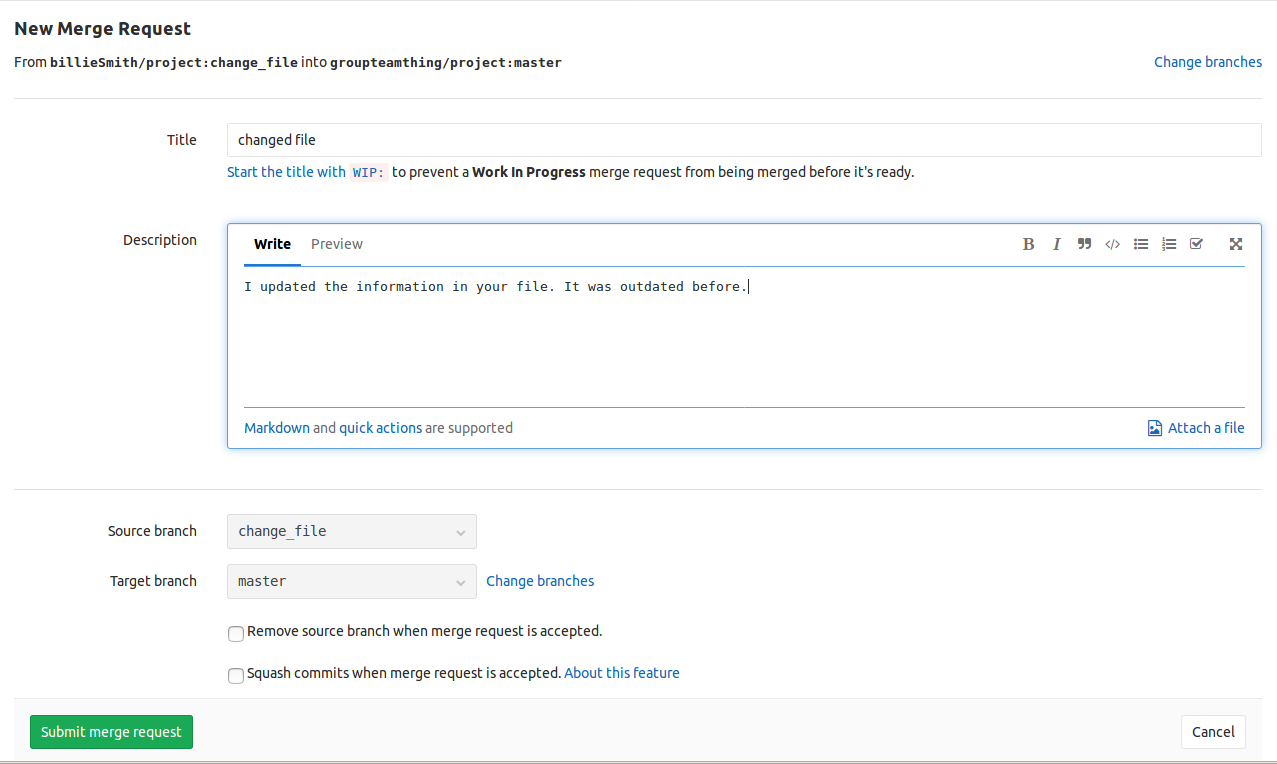
At this point,
billieSmithwould submit a merge request togroupteamthingon GitLab and depending on what they think, the merge request could get accepted or denied.-
Creating the merge request. Be sure to describe what you did and why.
-


Branch Names
As mentioned before, commit messages are to describe changes you want to update to your remote repository. Branch names on the other hand should say why you forked the project in the first place. Could this project use a new feature? Did you notice a bug? Are you testing out some changes you think you would want to see? What are you working on?
Need LFS?
Git LFS is available as well. For usage see: LFS Tutorial
GitLab vs. Github
Throughout this section of the survival guide, we have been talking about
GitLab and bringing back the importance of the use of SSH. There are
other services that use git including a similar one you may recognize
as GitHub. We have a server that runs GitLab for the department (which
becomes the website gitlab.cs.wwu.edu and
is where you log in) and that is why there has been an emphasis on GitLab
throughout this section. The major difference between the two is what
you get out of those services. We use GitLab because it is made to be
used by organizations for remote hosting of repositories. GitHub is a
free service that promotes open source projects, meaning when you create
an account there, you agree to leave your code publicly available so
anyone can comment and/or suggest changes. Neither GitHub nor GitLab
created git and neither did BitBucket or other forms of remote hosting
of repositories. git is an open source form of version control.
GitLab has its own extensive documentation. If you have a question that isn’t resolved by reading our documentation or their documentation please feel free to contact us.
A thank you
Special thanks to Brian Hutchinson for the git tutorial provided in his Spring 2017 241 class, where the template of this page originated.