Windows
Installing the campus VPN client
Use of the VPN is required to access department resources. This provides greater security than if department-operated systems were exposed directly to the Internet. The VPN is for use from off-campus only; it is not necessary to use the VPN from on-campus.
To install the campus VPN, open Chrome, Firefox, Internet Explorer, Chromium-based Edge (newer version) or Safari and browse to https://remotevpn.wwu.edu/. You will be presented with a window that looks similar to the following:
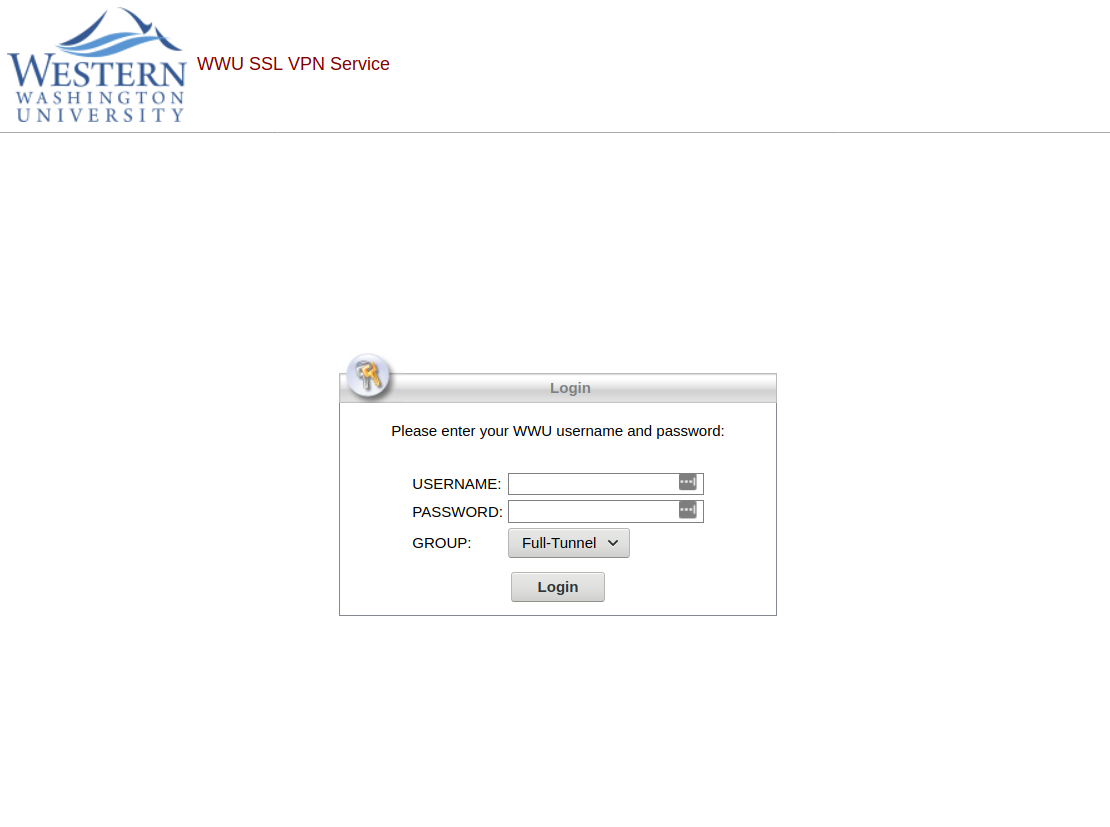
Log in to the site with your general university username and password (not your Computer Science account). It is not necessary to make any adjustments to the “Group setting” - that setting will be outlined under “Usage”. After logging in, you will be presented with the VPN download page. Downloads are available for Windows, MacOS, and Linux:
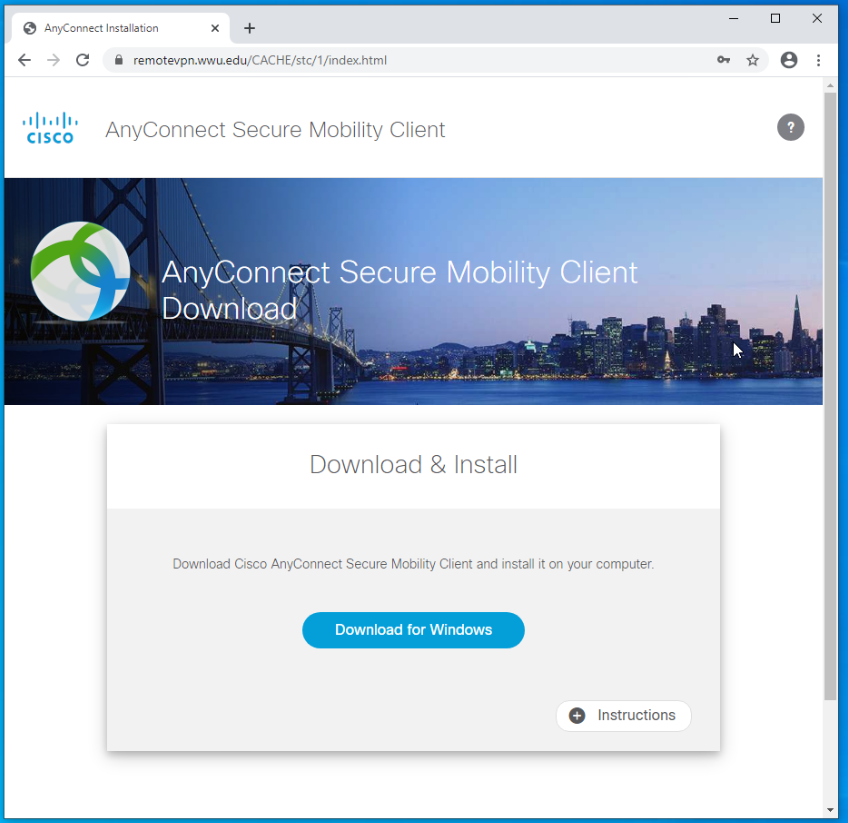
Click the download link, and the download will start. Once the download has finished, run the installer. If you are prompted to keep or discard the file, as follows, click “Keep”, and then open the file once it is displayed:


The installer will open, as follows:
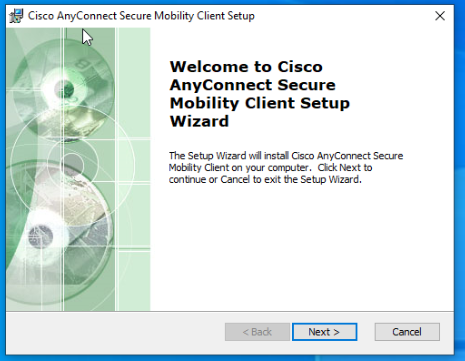
Accept the license agreement, then click “Next”:

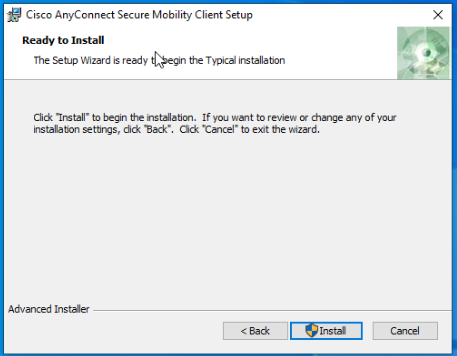
Click “Install”:
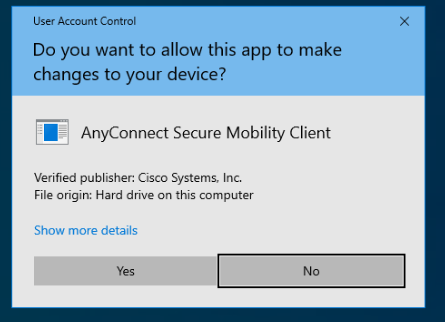
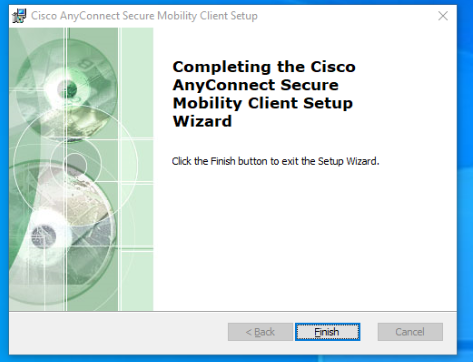
Accept the security warning, after which the VPN client will be installed:
Once the VPN client is installed, you may close your web browser. From this point on, no web browser is required, since the VPN client is now locally installed on your system.
Using the campus VPN client
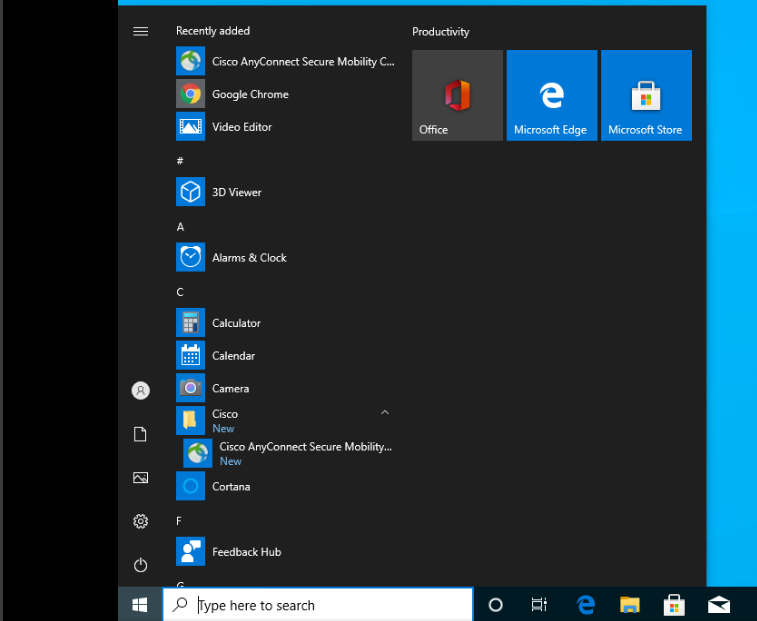
Open the “Cisco AnyConnect Secure Mobility” VPN client from the Start Menu:
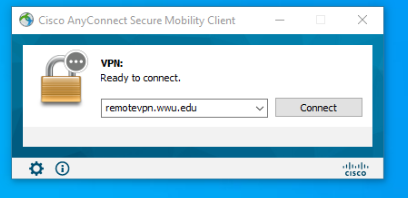
When the client first opens, you will need to enter the hostname of the VPN endpoint to connect to. Please enter “remotevpn.wwu.edu” in the box below and click “Connect”:
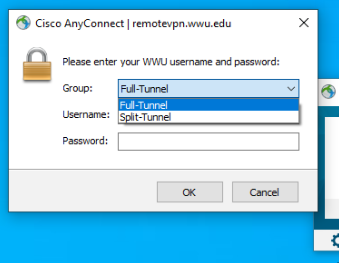
After clicking “Connect” you will be prompted with the following dialogue that requests the “Group”, “Username”, and “Password”. For the Group, you may select “Full-Tunnel”, or “Split-Tunnel”:
“Full-tunnel” forces all network traffic from your system to be routed through the VPN. This option is generally preferred in cases where you might be traveling and accessing untrusted networks.
“Split-tunnel” results in only network traffic that is destined for on-campus hosts (e.g., the Computer Science network, or some other university resource) to be sent through the VPN. All other traffic, such as to websites like google.com, routes through your regular internet connection as normal. This option is generally preferred.
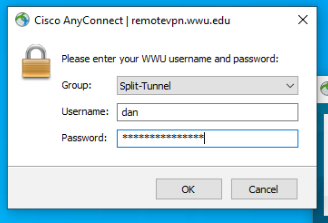
After selecting the group, enter your general university username and password (not your Computer Science account), then click OK:
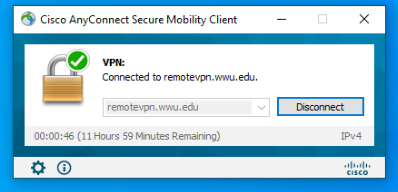
After successfully logging in, the window will disappear, minimizing to a system tray icon by the clock. You can locate the icon and click on it, which will present the following window confirming a successful connection. Click “Disconnect” once you are finished with your session. If you do not disconnect, your session will automatically disconnect in the time noted by “Session expiring”, where 12 hours is the maximum session time limit as of the writing of this article:
After the VPN client is connected, you may use your system as normal, connect to Computer Science department resources, etc. Please remember to disconnect when you are finished with your session.