Vagrant
Vagrant is a powerful tool to easily manage and configure VMs. This page will serve as a simple, bare-bones guide to introduce you to Vagrant. If you want to learn more, check out Vagrant’s documentation
Getting started
Imagine you had a group of developers that all needed the same development environment that relied on many different tools and each tool had specific version requirements. Vagrant would allow you to pre-configure this environment and then distribute it amongst the team. That way everyone has the same set of tools at their respective versions. The statement, “It works on my machine” when troubleshooting functionality has become a relic.
This is the magic of Vagrant. It enables reproducible environments on whatever OS you need to work in for prototyping. When done with the environment or Vagrant “box”, throw it away.
“Box” is the term Vagrant uses to describe it’s preconfigured VM’s. The creators of Vagrant, HashiCorp, have a number of official and approved boxes.
Bento has a popular bunch of boxes. They have many different operating systems that can be deployed easily with Vagrant.
VM creation and booting
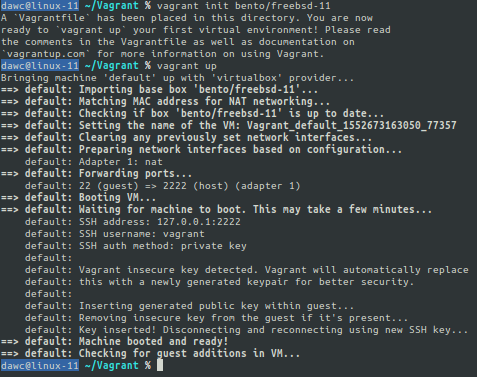 To spin up a VM
with Vagrant, use the
To spin up a VM
with Vagrant, use the vagrant init command like so:
vagrant init bento/freebsd-11
This command will initialize a Vagrantfile file in the current
directory. This file serves as the configuration for the virtual
machine. In depth configuration can be found in Vagrant’s
documentation. In this
case, we are setting up a VM running FreeBSD 11.
A Vagrant file may look as simple as this:
Vagrant.configure("2") do |config|
  config.vm.box = "bento/freebsd-11.2"
end
This file tells Vagrant to reach out to Bento and create their FreeBSD 11.2 Box locally on your system as a console-based virtual machine.
After we have a Vagrantfile, we are one step away from running our
VM!
vagrant up
With this simple command, Vagrant reads the Vagrantfile to figure out
which box you are using, downloads it, and boots it up!
VM management
There will come a time where you no longer want the VM running. To
shutdown the VM, run the following from the directory with your
Vagrantfile:
vagrant halt
This will gracefully shutdown your VM.
If the virtual machine you have been using just isn’t needed anymore, there’s good news! Vagrant has a command to delete VMs too:
vagrant destroy
Again, from the directory containing your Vagrantfile, run the destroy command and it will
walk you through a confirmation before removing the associated virtual
machine and vagrant files.
VM interaction
 Now that we have a VM
vagrant up and running, we can interact with it!
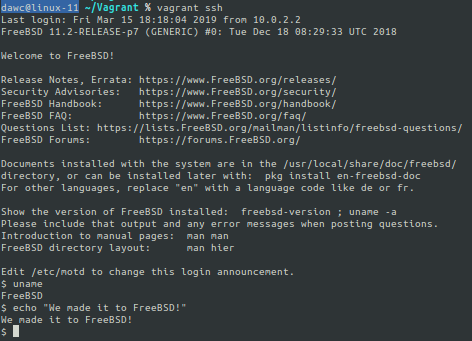
The simplest way to connect to and interact with your VM is to use the following command:
vagrant ssh
If you are in a directory with a Vagrantfile and that virtual machine
is running, you can ssh to it with the vagrant ssh command.
After you have ssh’d into the virtual machine, you are free to do
whatever it is you need to do! You have complete and total control over
this virtualized environment!
Need to use Vagrant for Docker? Click here